Foundations to Flourish: Watercolour
Vol 2: Understanding the brush and preparing your paper
Hey!
Welcome back! This week in Foundations to Flourish, we will be looking into the paintbrush and how to prepare your paper.
I haven’t met one person that’s walked through my studio door that knows how to prepare their paper for watercolour. It is fundamental to prevent warping while you are painting. I hope this will help you.
The Brush
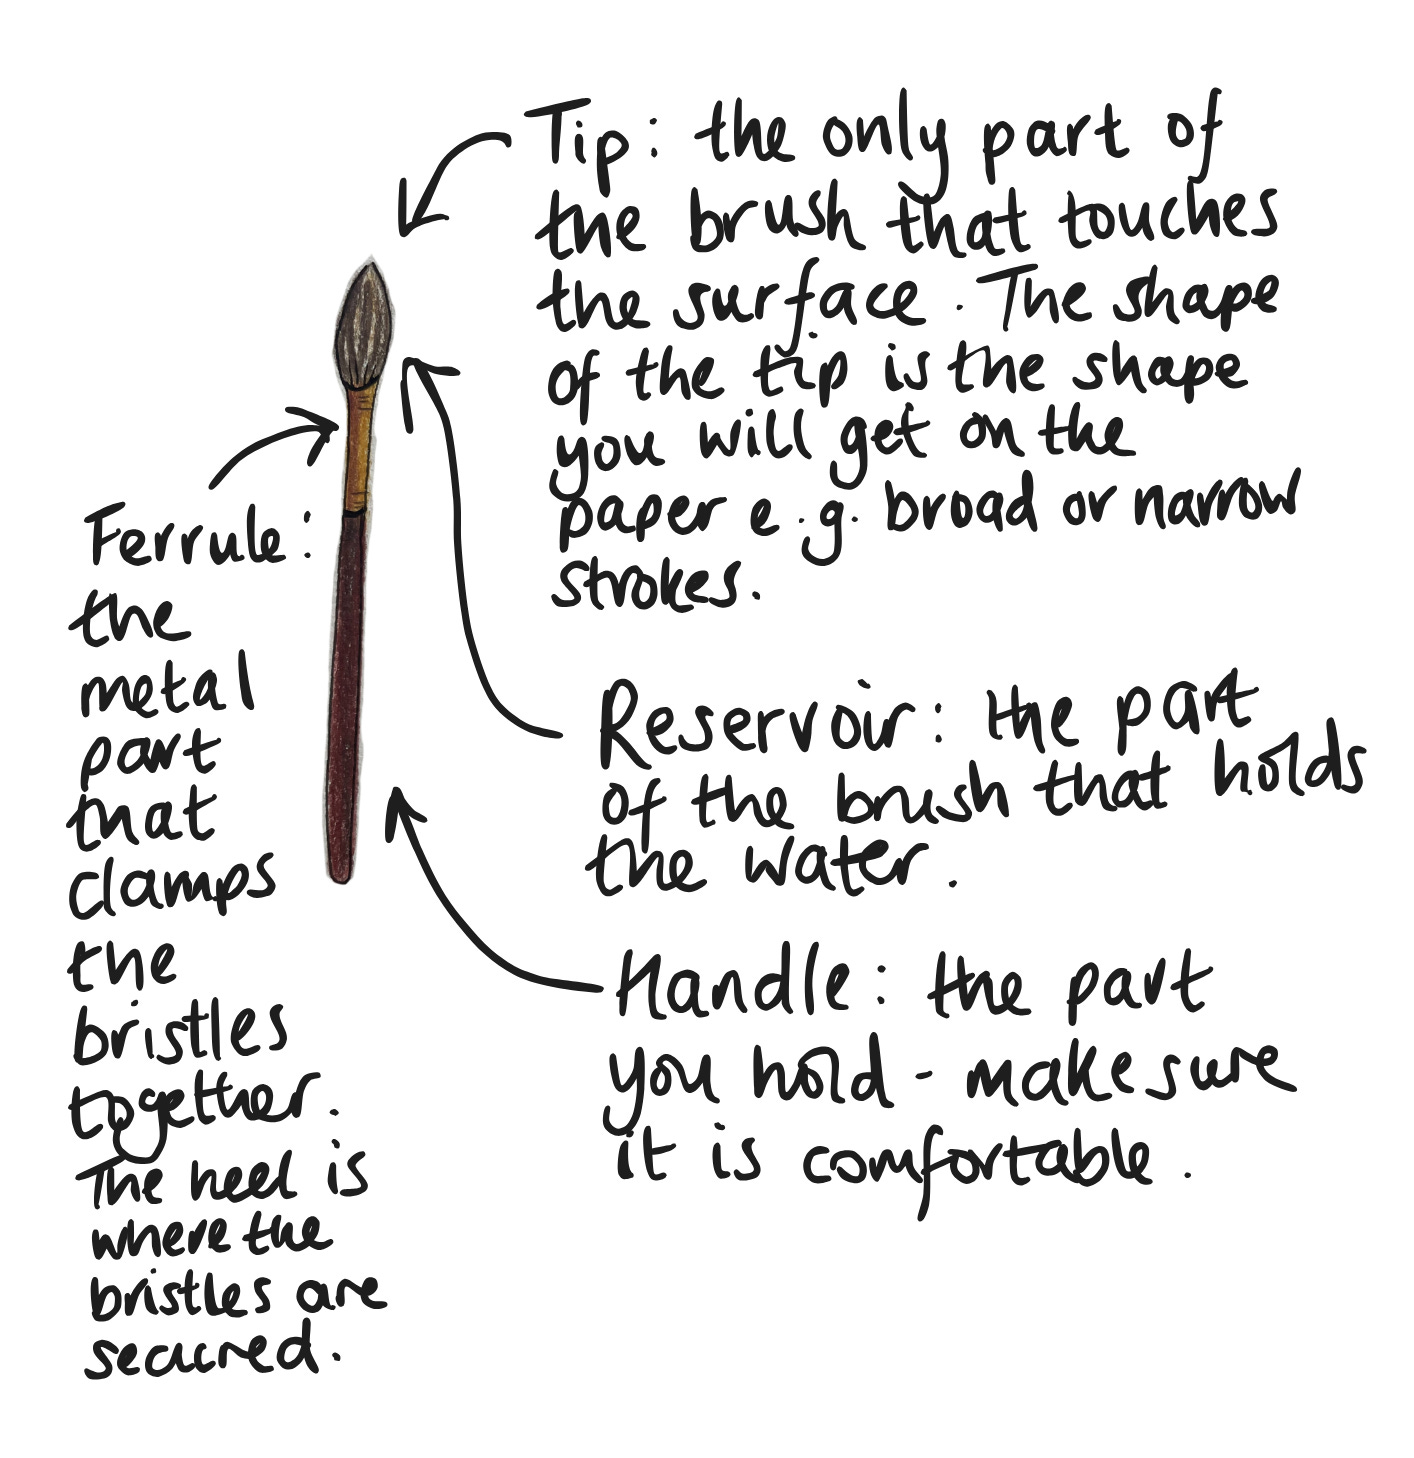
The paintbrush will be a fundamental tool you’ll use to apply your watercolour paint. I watch many people overload their brush with the paint or water, or apply too much pressure so they end up scratching the surface with the ferrule. Be gentle with your tools.
Here are the elements of a brush and what they do.
Preparing the Paper
Stretching watercolour paper is a way to stop it from warping or buckling when you paint on it. Here is how you stretch your paper.
Resources
You will need:
Watercolour paper - hot or cold press
Blue scotch tape or masking tape
Mop brush or sponge
Water
Tray
Wooden board
Scissors
Method
Here are two ways to stretch your paper:
Number One:
1: Cut the paper to size
Use a pair of scissors or a guillotine to cut the watercolour paper. Tip: cutting it slightly larger than the size you want to paint, allows room for the tape.
2: Soak or paint the paper with water
Place the paper in a clean tray of cold water for about 5–10 minutes or use a sponge or mop brush and add water evenly over both sides instead of soaking.
3: Remove excess water
Lift the paper carefully and let the excess water drip off. Lay it flat on your board.
4: Secure the paper
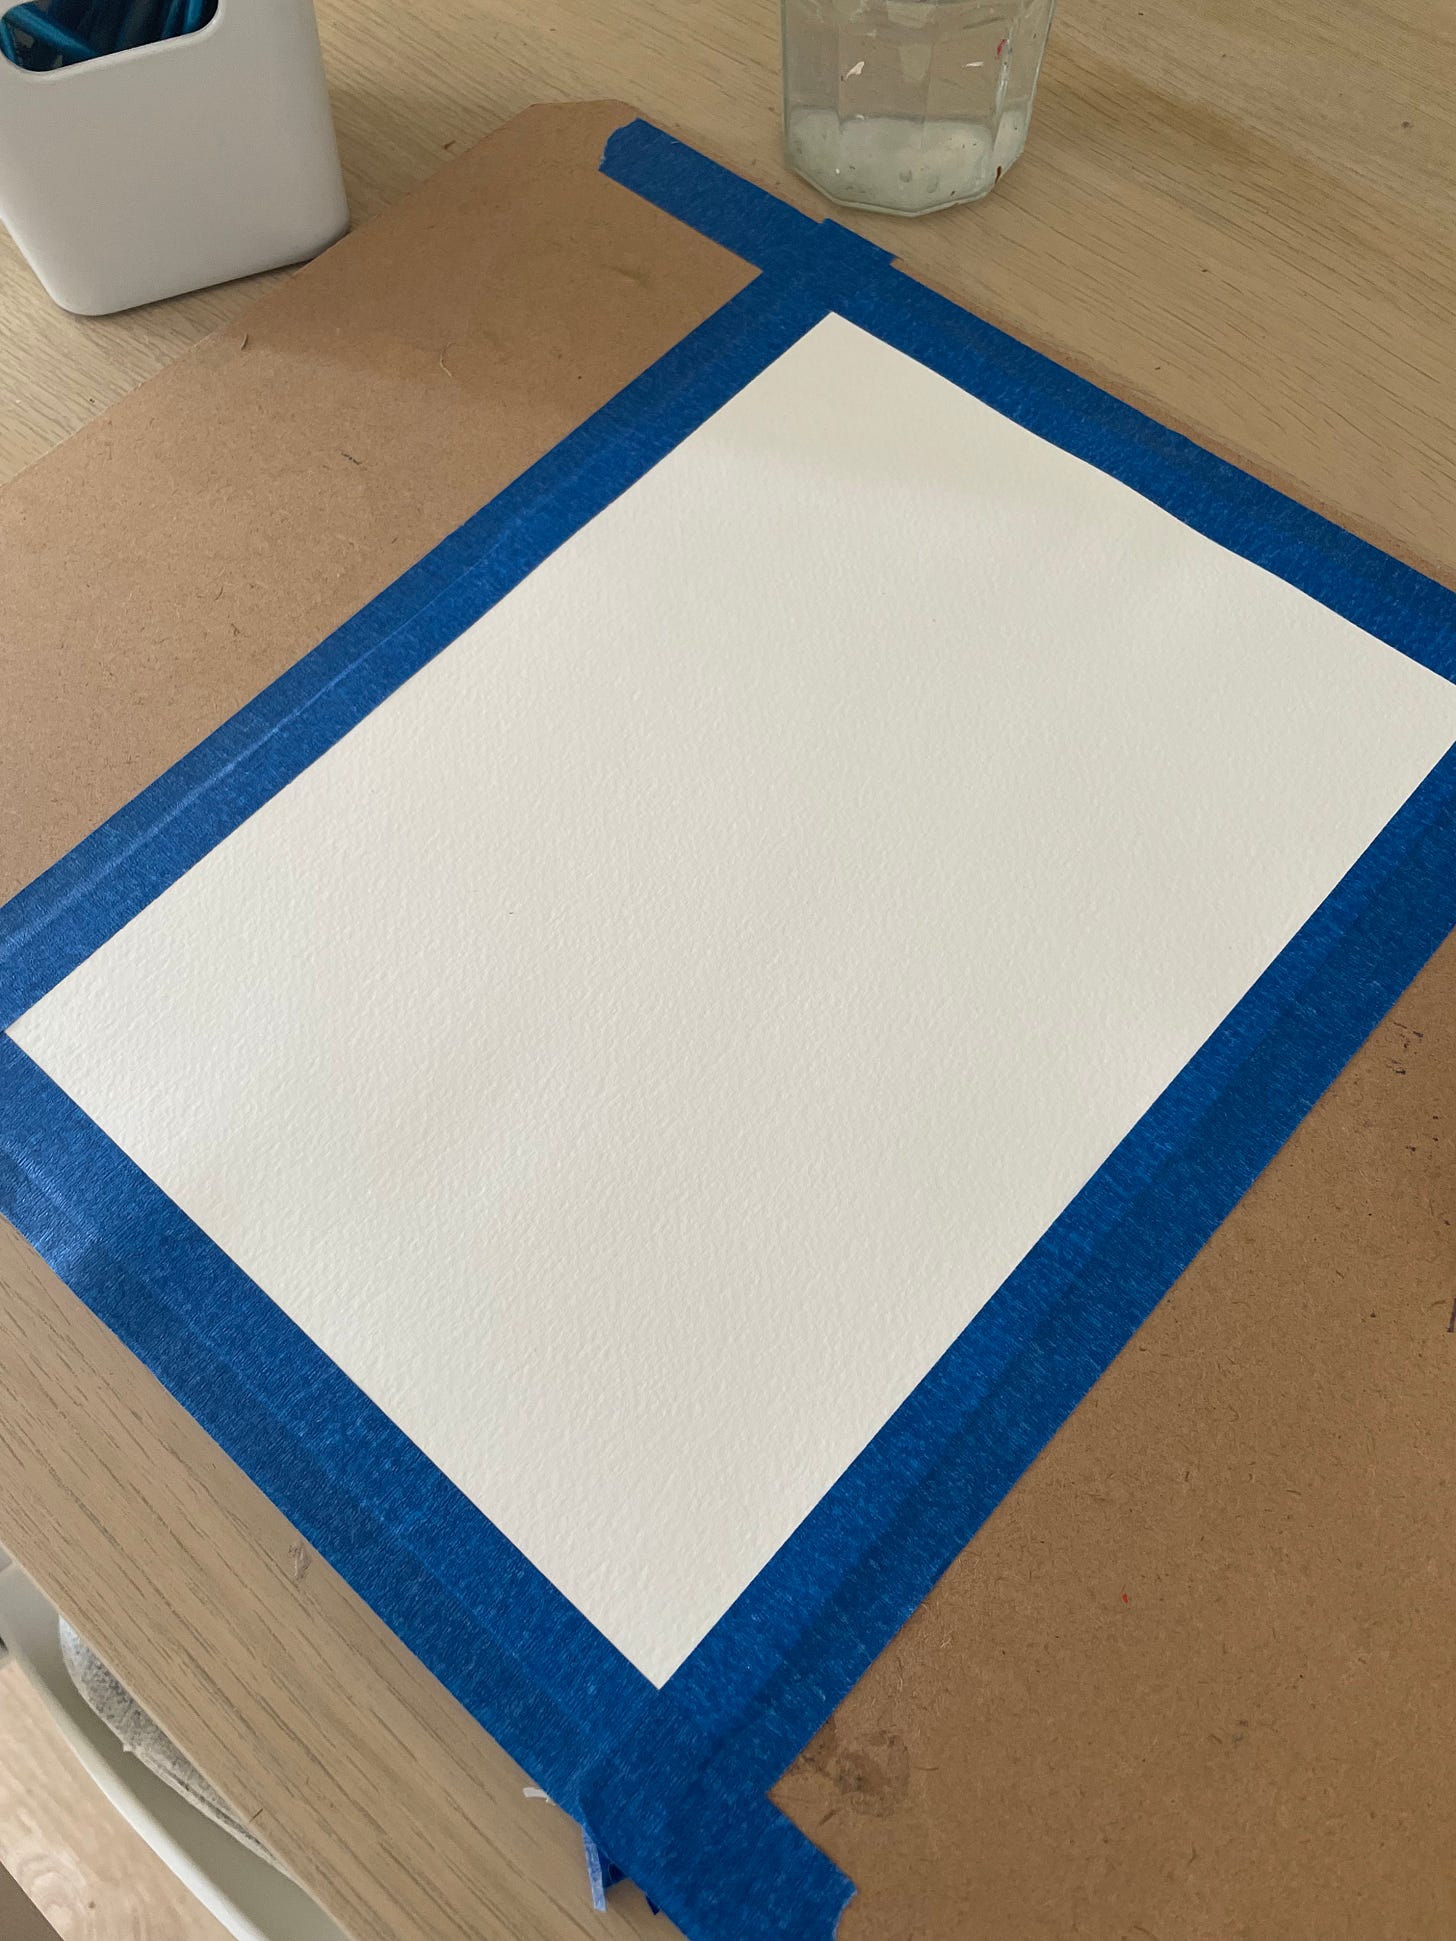
Using a wooden board, place the paper onto it and smooth it gently with your hands to remove air bubbles. Use masking tape or blue scotch tape, stick all the paper edges firmly to the board.
5: Let it dry
Let the paper dry naturally in a flat position until it becomes dry. It is then ready to paint.
Number Two:
1: Cut the paper to size
Use a pair of scissors or a guillotine to cut the watercolour paper. Tip: cutting it slightly larger than the size you want to paint, allows room for the tape.
2: Secure the paper
Using a wooden board, place the paper onto it and smooth it gently with your hands. Use masking tape or blue scotch tape, stick all the paper edges firmly to the board.
3: Soak or paint the paper with water
Use a sponge or mop brush and add water evenly over the paper.
4: Let it dry
Let the paper dry naturally in a flat position until it becomes dry. It is then ready to paint.
I’m already looking forward to seeing where we head next with Foundations to Flourish. I’ll see you soon for the next part where we will begin to develop your skills using watercolour.
In the meantime, please do let me know how you’re getting on – I can’t tell you how happy it makes me when a little art-related comment pops up on my phone. It means I get to talk about what I love most – art! 😊
Enjoy creating,


